The more I have looked for it, the more I have seen how large a problem erosion is for our area of Minnesota. Among such facts was that apparently the Zumbro River saw massive erosion into a valley after initial settlement (late 1800’s) and required the state reacquiring land to help stabilize it. The land in our valley has mostly stabilized, but not entirely so. One problem in particular troubled me, a ‘sink hole’ in the ravine’s main creek bed.
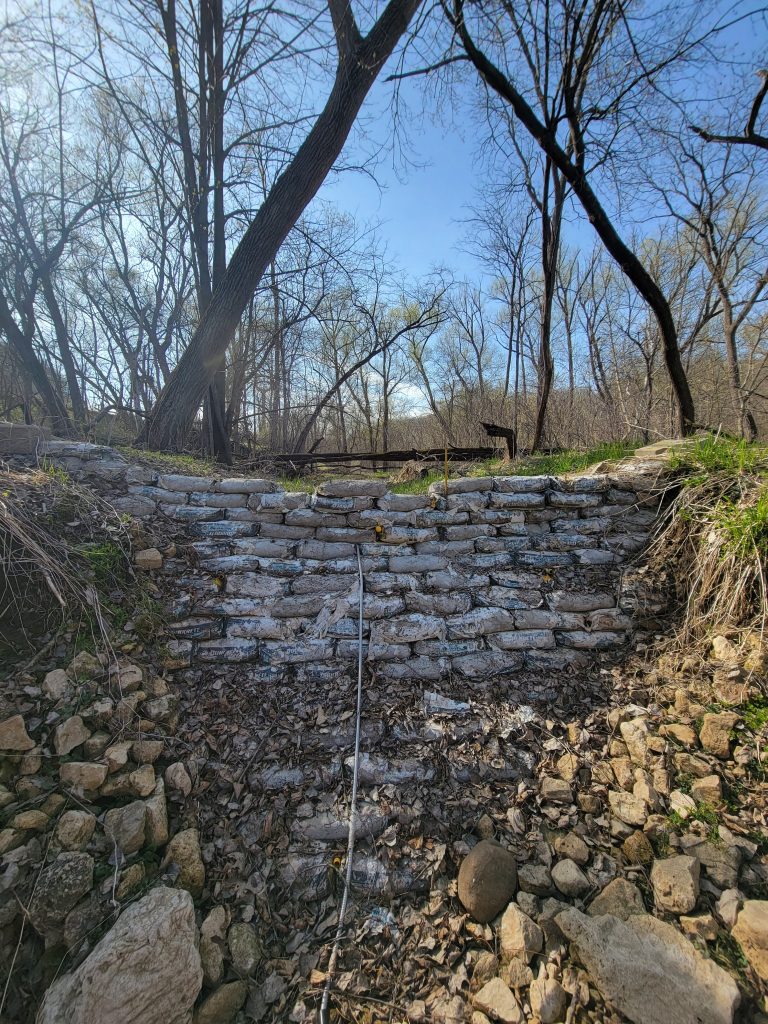
This sink hole, as it was commonly called, wasn’t so much a sink hole as a waterfall (in the spring). A pile of stones at the base had slowed erosion at that point, allowing for a 4.5 foot (1.5 meter) drop, like one upstream I had reinforced earlier. My concern with this arrangement was that water was gradually eroding it away. With that drop gone, the stream bed would pick up velocity and risk rerouting towards the edges and expanding the ravine. Stabilizing the current setup was preferable.
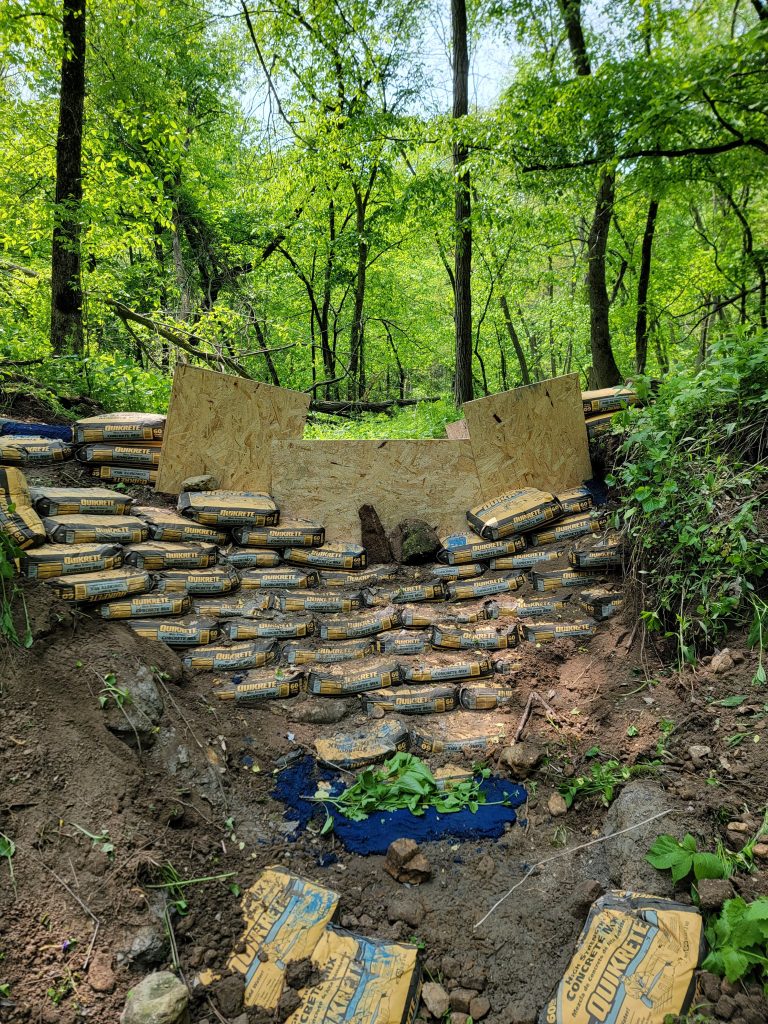
I intended to copy the success of another check dam/weir I had created, as written about here. I won’t go into details about the method but it is pretty simple. Take concrete bags and stack in a retaining wall shape. It isn’t as pretty as other options, but it is simple, effective, and relatively cheap.
Well, I also tried pouring concrete this time. I decided a concrete lip along the top might be interesting to try and slightly better because it could more evenly distribute the water than the lumpy bags could, evenly distributing the flow across a flat top. Poured concrete is a lot more work but should work better in places where it needs to be more freestanding (not back-supported with dirt like the concrete bags). I also wanted to play with concrete pigments.
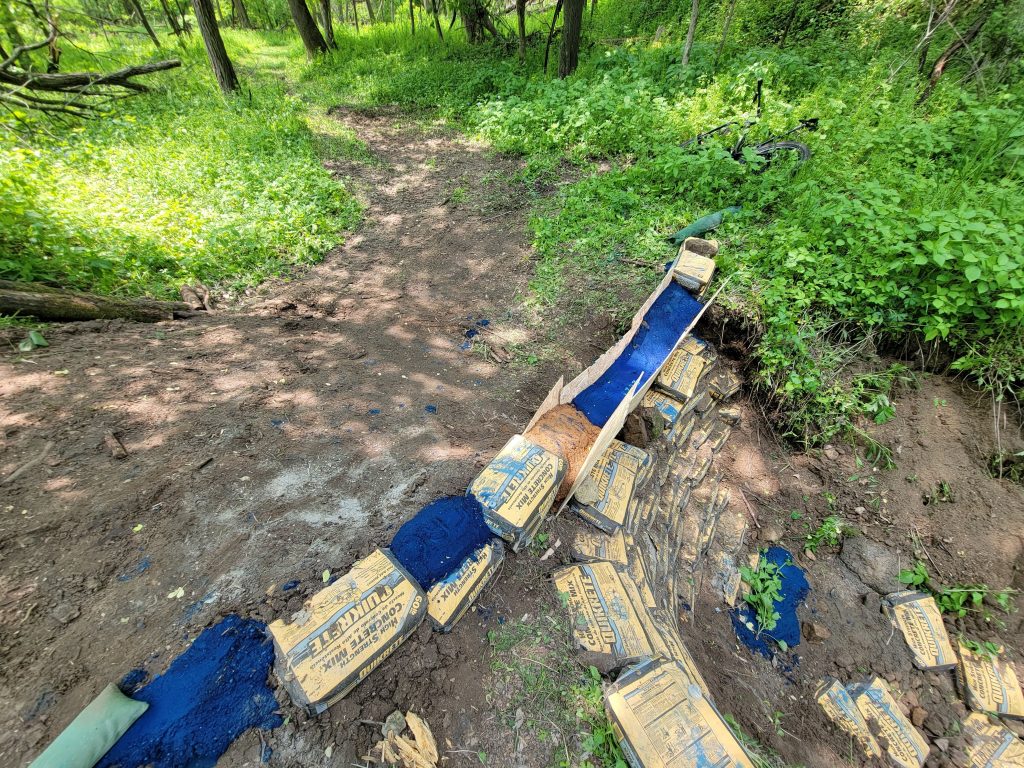
The concrete pigments mixed with gray concrete were somewhat bland in the red and yellow cases. The red was a decent terra cotta, and the yellow a sort of gray-yellow. The one I tried last, however, a blue, was absolutely stunning. It made an extremely vivid blue.
This dam was wider but less tall than the previous one. It required a bit of road construction near the site to get the ravine trail up to standard (on camber) for a heavy tractor’s worth of concrete bags. I will admit, that while I am quite confident in the lower part of the structure, the concrete bag retaining wall/dam, I am less confident in the poured concrete top. Worse case scenario, that part falls sideways. It would still be an effective structure overall in that case, slightly lessened in stature.
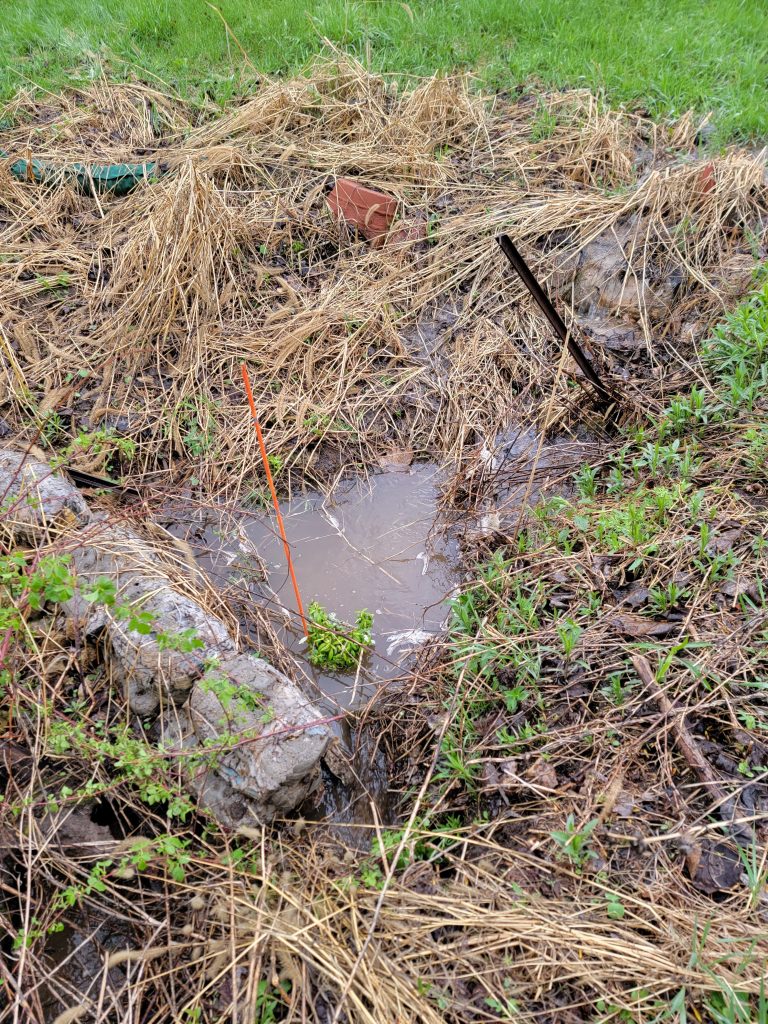
The biggest danger I am trying to avoid is exactly the problem I saw with one of the smaller erosion control setups I had built. Seen in the picture above, water managed to collapse around the dirt side of the structure and bypass the structure, rendering it useless and washing away soil (until fixed). The main way to avoid this is to make sure the sides are properly considered so that hardening and shaping of the area prevents water from finding another path.
As before, I seeded with native grasses to help stabilize the site further.
Erosion control like this, part of soil and water conservation, is an easy problem for people to avoid. It tends to be a slowly developing problem that encourages procrastination. Yet there are many reasons to build control measures- reducing sedimentation of the rivers, capturing more rain water for the aquifer, and stabilizing the land structure to maintain land value and utility. It is useful, and an interesting challenge. Just be careful to think about how water actually erodes (from the leading edge, from undermining, and faster with more velocity).