
Continuous exterior insulation is this idea that we can reduce thermal bridging and make a “perfect wall” assembly in home (and commercial buildings). It’s really taken off in recent years as a understanding of building science has become more widespread that this is the right way to do things. The ‘classic’ (cheap) home wall here in the US, insulation stuffed in a 2×6 cavity has the problem that cold isn’t stopped at the border but has a chance to hit the humid moist air of the house and condense, building up rot and mold, while also just not insulating that well. It has also become clear that “R-value maxxing” isn’t the way to really make an efficient home, air tightness is just as important, if not more important.
So what’s the problem? Well, continuous insulation is expensive, and some methods for it don’t make great air seals.
The simple answer is Zip-R insulation, but it is expensive, easy to mess up the air seal, has lower R values (by my climate zone 6 standards), and doesn’t keep the sheathing warm as a ‘perfect’ wall does.
Rigid foam insulation boards are cheap-ish, but require a high labor second pass across the wall, trying to aim gigantic screws into studs that can’t be seen (buried beyond liquid flashing or house wrap) while balancing giant wind-blown boards around on a ladder 20 feet in the air. They also require taping and sealing, more labor. Simple in theory, tedious in practice.
Then there are various commercial wall systems, which are both very expensive labor and very expensive materials, but do often look well-designed.
Larsen trusses and double stud walls designs are complex (more labor and materials), take up more floor space, and are vulnerable to moisture leaks as well while also not being ‘perfect wall’ assemblies.
The lack of good options as been annoying me and I have been working away on it for well over a year now.
I had two goals:
- Simple labor: it should be possible to frame this on the wall flat before it is tilted up.
- Closed Cell Spray Foam (ccSPF) as the key ingredient: ccSPF is not cheap, but the labor is fairly easy and reliable (with a few caveats, like spray in 2″ lifts and don’t spray on damp wood). It provides air sealing, vapor seal, and insulation in one easy to install package. It has high R-value per inch, and the comments about it being ‘bad for the environment’ are from when older blowing agents were used, since replaced.
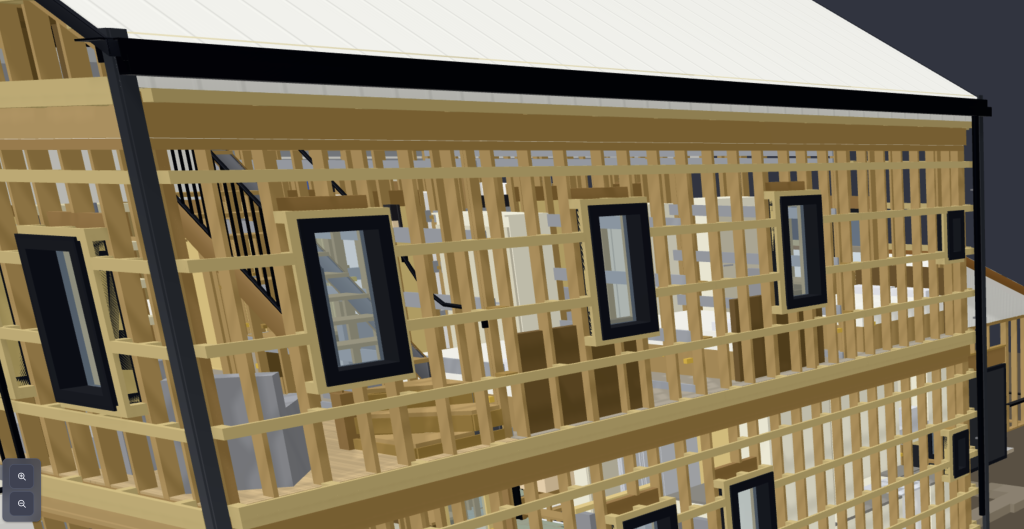
So what do we have as an assembly that solves this? I give you, the ‘Catlin truss’, vaguely inspired by the Swinburne Truss but actually looking more like the classic rigid insulation foam panel assembly:
- Frame the wall as usual, an assembly like: (latex paint on drywall), 2×6 stud cavity with R-21 fiberglass batt, 1/2″ plywood sheathing or OSB (don’t need Zip here, it’s not the vapor barrier)
- Screws go on a grid every 32″ x 24″ (can actually widen to 32″ x 32″ for some exposed fastener metal siding), one screw per wood stack. Here we have 32″ as the horizontal spacing with 24″ as the vertical spacing between girts. A KDAT (pressure treated) 2×4 is placed horizontally on top of stacks of 2×4 offcuts, stacked 3 high over every other stud. We are using the stack of offcuts (3x, 1.5″ = 4.5″) because it doesn’t require any measuring. The exact size of the offcuts doesn’t really matter too much. Smaller is better (less thermal bridging) down to a minimum of about 1.5″ x 2.5″. An 8″ screw goes into the girt, through the stack of offcuts, and into the stud beneath. Repeat along the length of the girt. One ‘gotcha’ on screws is that some have too long a thread to assure good clamping, Simpson SDWS 3″ thread is too long, the TimberLok and Headlok 8″ are the current recommendation, or else a longer screw.
- An aside, but it actually can reduce thermal bridging slightly if the offcuts aren’t perfectly stacked (ie rotated versus each other) giving less contact area between them. So don’t be obsessive about getting them neatly stacked. Do avoid getting the offcuts projecting into the necessary space for rough openings (windows), though, a cleaner stack there is likely the right answer.
- Around the windows we have added the exact same thing, with a thin plywood buck to cover the foam gap (plywood doesn’t physically hold the window, a girt on these standoffs does).
- Foam up 4″ with ccSPF (adjustable by climate zone, sprayed in two lifts). This should leave a 0.5″ continuous rainscreen gap (plus another 1.5″ gap of the girt, not continuous though). Spray up to full height right around the window bucks.
- Fasten the window trim and cladding
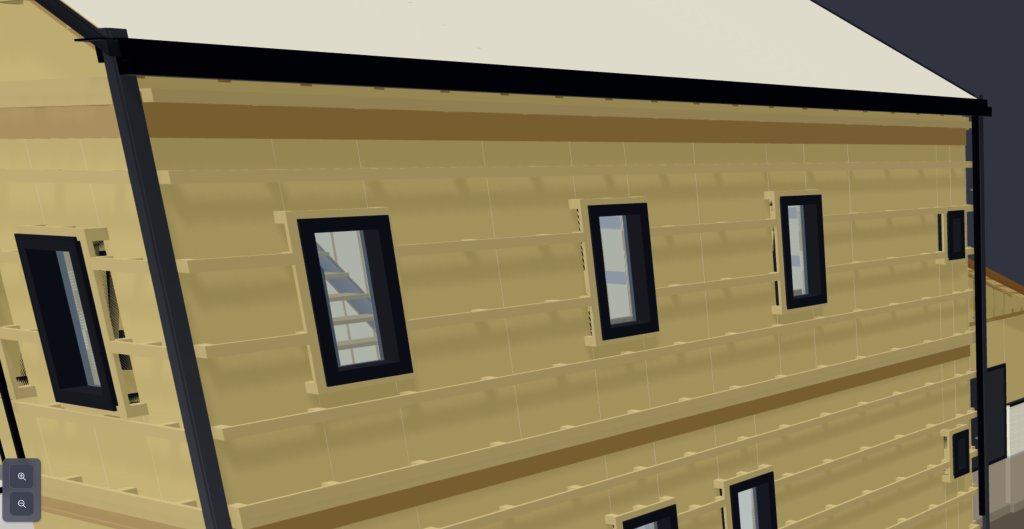
As described, the R-value of this assembly is R-37.9. Note that many places don’t factor in thermal bridging when they report R-value, so it’s R 51.6 in an ‘ideal’ slice without thermal bridging (not realistic, but often how things are reported).
The advantages of this are:
- The main advantage is simple labor: part of the regular framing job, very straightforward to manage there, then two passes with closed cell foam, then the siding crew.
- To my surprise, the thermal bridging of these offcut wood stacks is less than a rigid foam panel installation. Why? Because the wood stacks provide a different (stronger) structural connection than the ‘leveraged’ screws through rigid foam. That means fewer fasteners can be used, roughly half as many, and fewer steel point bridges through the foam means better r-value. It also means cheaper, these long screws are expensive, using half as many is real savings.
- Excellent air seal, much better than you would get with all but the most fastidious Zip-R or rigid foam installation
- Relatively forgiving tolerances: generally the girts don’t need to line up perfectly between walls, nor be perfectly level (probably best if you do, but shouldn’t change the siding outcome)
- Includes a rainscreen gap (if using something like corrugated siding which doubles as rainscreen, you could use fewer offcuts and foam right up to the top of girt)
Disadvantages:
Not compatible with all siding types (or would require another plywood layer over the girts for some). Note this should be able to run girts either horizontally or vertically without much change
Side investigation: I found that switching to stainless steel screws, which I thought would reduce thermal bridging, is actually worse, because their shafts are larger diameter, canceling out the benefit. And they are a lot more expensive.
Side question: what do I plan for the roof? An I-joist rafter roof, filled with part ccSPF foam, part batts. The outsulation approach makes less sense (cost wise) on the roof, because the thermal bridging of the simple, long i-joists is a lot less, and the air sealing is a lot simpler as well. The flat deck above the rafters is easiest for roofers.
Side advice: A simple gable roofed ‘box’ shaped house is consistently the key to efficient design and low cost. It used to be almost all traditional home architectural styles were some variation on this, so it can look great, but in recent years, every house is splattered full of different gables, dormers, and worse.
Probably someone has done this, or something like it, before, but they just haven’t written about it.
Colin Catlin 2026