
My largest and grandest outdoor project to date, I give you: a dam!
Now, first, let’s be clear. This is a check dam. So not Hoover Dam, but something smaller meant for water to go over. The general purpose is to slow the water. In low water flow, water will pool behind and gradually be absorbed by the ground and carried underneath by the drainage tile. In high water flow, the water goes over the dam – but is spread over a wider area, with lower velocity, over a non-erodible surface.
Let’s also be clear, this is a seasonal stream which probably isn’t running with water for more than three weeks a year. It’s mostly just a weedy ditch. A weedy ditch, that when it does have water, has rather a lot of it moving quickly, and accordingly has a tendency to erode large amounts of dirt and eat up land. Climate change in rainfall is a factor, as well as the changing ecology of this little valley (as prairie land was used for pasture and agriculture, now mostly regrowth forest, with logging and occasional patches of agriculture).
Control of the ravine is a complex project. spanning the land of many different property owners. My goal is simply to protect the ravine from getting too close to our farm house. This is basically a two part operation – one to stop the ravine from getting wider, and the other to stop it from getting deeper. Controlling the width is controlling the water flow down the property towards the ravine, which we’ve done with various measures. Now this part is for controlling the depth, and involves slowing the velocity of water which runs down the center stream of the ravine.
The first major hurdle of the project was building an access trail into the ravine, as I wrote about earlier. I also spent a while pruning up the trees to let a little more sunlight in to nourish a thick carpet of plants.
Now the next step was clearing out the trough which brings water down the hill (visible below in very bottom left, a rock lined channel). This passes through a PVC pipe and a drainage pipe, with an additional overflow option. In addition, I decided to build a small berm around the ravine in a U-shape approaching the dam (visible in the middle).
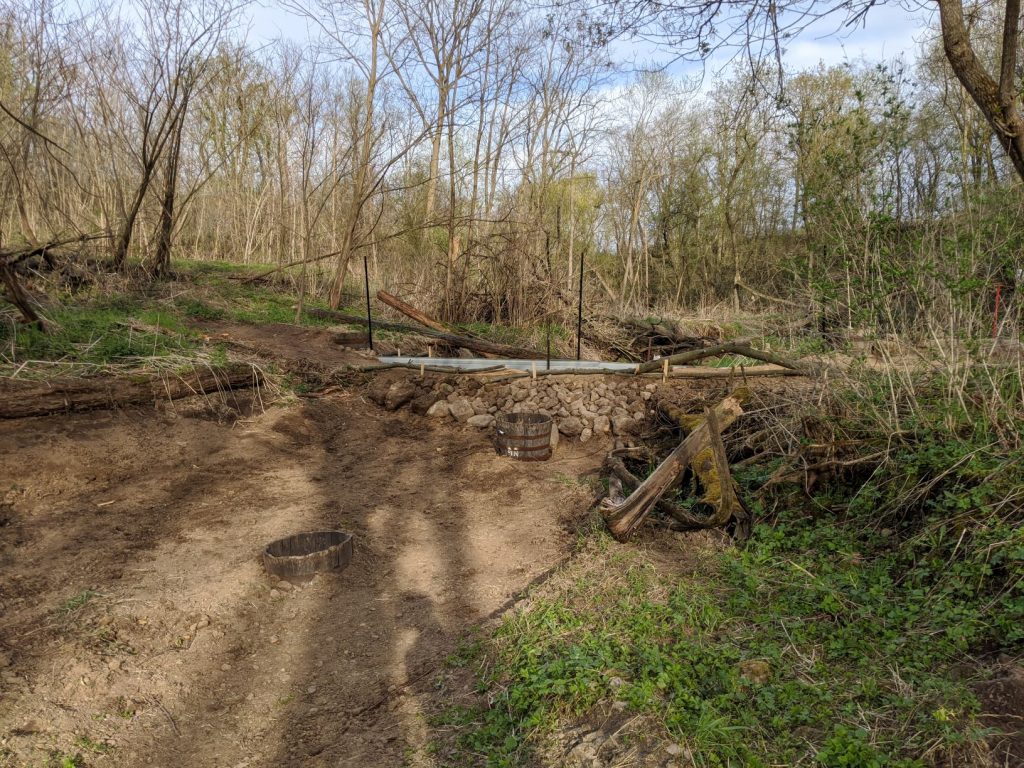
This is all rather like designing a fortress. I have always wanted to build a castle, but this will have to do for now. The idea here is to prevent any possible breach around the dam, as the greatest threat to dam failure here is the water going around the dam by another new channel. We want the water to flow over the dam and only over the dam.
The actual dam construction is relatively straight-forward. Layered sheets of metal roofing hold the edge of an earthen embankment. The embankment itself holds back a pool of water. A pair of 4-inch drain tile pipe runs under the dam. Three major posts in concrete supported by several subsidiary t-posts hold the sheets in place. The posts all serve to hold cables as a handhold for a tree log to be thrown across.
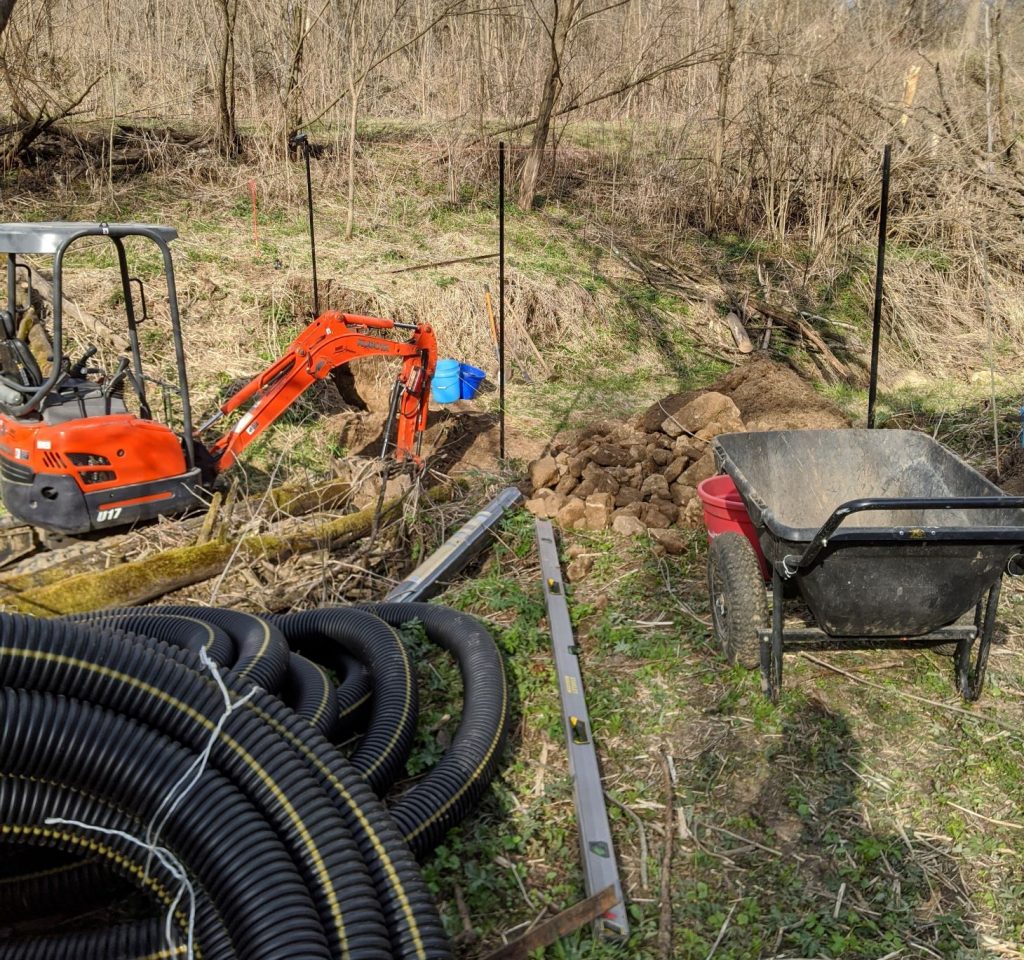
Things generally went pretty well. The anticipated problem of spring, having ground too wet, did not occur because of the weird spring weather we are having (alternatively hot, then cold, but not raining). Instead we had another problem: rocks. Yes, the ravine bed’s dirt is packed full of large rocks which make digging shockingly slow even with an excavator to do the work. This meant it took forever to get enough dirt to fill the embankment across the stream bed (6′ * 24′ * 4′). This fill mostly had to be hauled down the hill from another work spot up top.
Perhaps the most exciting part of that was me rolling the tractor on its side while going down the hill once. It was less dramatic than it sounds as it rolled slowly and I just hopped out. Mostly I spent my days listening to the audiobooks of the Wheel of Time. After 5 days of hard work, it was done, and I wrapped up by planting an assortment of native seeds.
One of the primary seeds I sowed into the ravine was Virginia Wild Rye from Prairie Moon Nursery. It lives in moist areas and is shade tolerant, living in forests. It is a food source for various native animal species. Generally it sounds like the ideal grass for establishing in the ravine, when supplemented by some of my other favorites like the swamp milkweed. In general, proper planting is one of the best ways to control erosion as prairie grasses absorb more water, and with their massive root systems are quite resistant to erosion.

The total cost of the project was somewhere over $400 for supplies. The design of the dam, using a double layer of sheet metal roofing, was entirely my own creation. The only downside to the design is visible by the slight bulge in the left side of the dam. It is difficult to set the metal roofing in place, and hold it in place, while filling in with dirt, without the metal flexing out of position. On the right side of the dam, this can be seen to have been accomplished well, but not so perfectly on the left. Not surprisingly, the left side was done first, with the initial fill around the metal being done by machine (which included by driving the bucket of the tractor into the metal at one point…). The superior way was to fill in around the metal roofing entirely by hand, carefully, then bringing in the remaining dirt by machine.
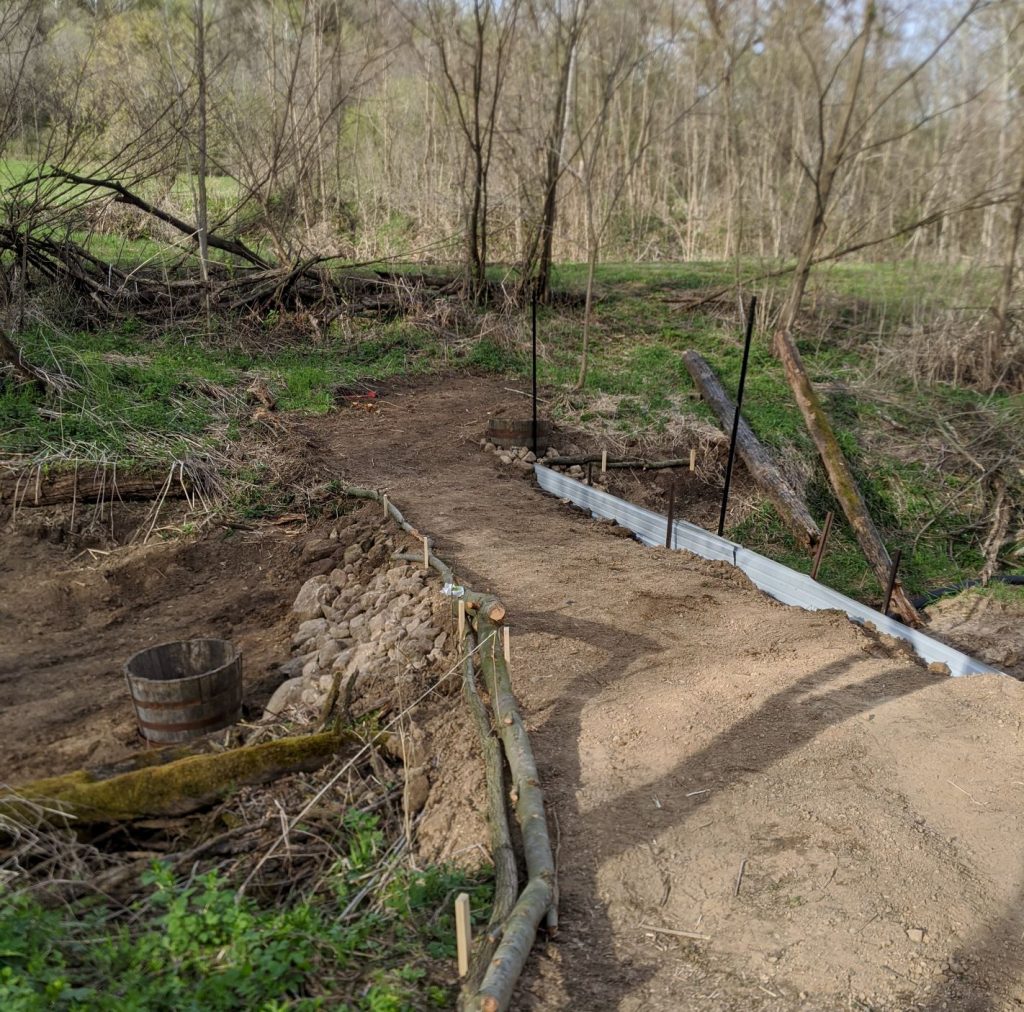
While the trail to the dam, and the dam itself, were primarily intended simply for the construction and erosion control, it actually makes a rather scenic and convenient trail. I have already ridden a mountain bike down the trail, across the dam into the ravine system, and back, and it worked wonderfully.