

It’s been a year and a half since this computer broke, and it’s been a tedious, intermittent road to recovery.
When it was first broken, the screen stopped displaying any information. The computer only worked, occasionally, on an external monitor in safe mode. I suspected a graphics card issue, with the Nvidia driver reporting no graphics card present, but also a potential monitor issue, as in safe mode it would only display on external screen.
In the process of trying to fix it as a potential software issue, I managed to corrupt both Windows and the BIOS when the computer crashed during an update.
That left me in a sad state, with a completely dysfunction computer. It wasn’t quite “bricked” as I could see the motherboard could still, say, charge the battery and report that with the front status LEDs. But no display, no error messages.
At this point, I tried the following fixes:
- Buying a replacement laptops graphics card. This is a finicky thing. The card I got was almost exactly the same card, for an ASUS G75VX, not a ASUS G75VW like mine, so it didn’t work…
- Buying a replacement monitor
- Unplugging the CMOS battery and letting it sit for a while reset the BIOS, which fixed the corruption issue luckily.
- Stripping the computer down to the bare essentials of Motherboard, CPU, 4GB of tested RAM, Power Supply, and VGA Monitor. I’m now converted to this approach of removing all but the essentials -enables a far more methodical approach to major problems.
- Reseating everything, even the CPU (although I did that more for fun, since I hadn’t done that before). ‘Reseating’ is the fancy word for ‘unplug the thing and plug it back in.’
- Attempting every possible combination of components and configurations
- Baking the graphics card
And of all things, baking the graphics card worked! Apparently this computer doesn’t run well on just integrated graphics. Other computers I have worked with, if just the external card were dead, would be more-or-less operational on just Intel integrated graphics, so I wasn’t really expecting the external graphics card to be the fix like it was.

But I still had some problems:
- The laptop’s monitor (even the replacement) still wouldn’t work
- The computer wouldn’t recognize the internal hard drives.
I quickly decided I would be happy to ditch the laptop monitor. The computer is now a desktop computer with built in keyboard, touchpad, and speakers. I think it looks kind of neat this way. Besides, the computer was already a 9 lb, 17″ beast, it wasn’t terribly portable to begin with.
But I really wanted the internal hard drives to work (it has two bays), understandably. Yet I could not, despite many hours of effort, get them to be recognized in BIOS. A major difficultly here is that the ASUS BIOS for this laptop is horrible, removed of all functionality except the bare minimum. Apparently they want to prevent gamers from messing around with settings, then trying to get warranty computers when they mess up. Apparently the issue I was having could often be solved for more advanced ASUS motherboards by disabling Secure Boot. But you can’t even disable secure boot here!!!!
Normally ASUS is a great company, but here, well, I am not so happy about the restricted BIOS. I tried to find other ways around this issue: flashing in a new BIOS update, trying to force feed motherboard drivers to the BIOS (via a feature in the install Windows USB drive) for the Intel chipset/ACHI controller, and then finally skipping this and using the external hard drive enclosure to boot to Windows, where I installed ASUS software and updated all drivers. I had fun installing a ‘portable USB drive’ version of Windows to the drive. Now, like Linux, I could carry around this hard drive enclosure (and I believe) boot any computer to that hard drive and Windows.
The only thing I haven’t done is install drivers from the original manufacturer’s disk -which I still had a few months ago, then placed in a convenient location knowing I might need it, but it has been lost in the Katie Lane house moving out operations. I may try that fix in the future.
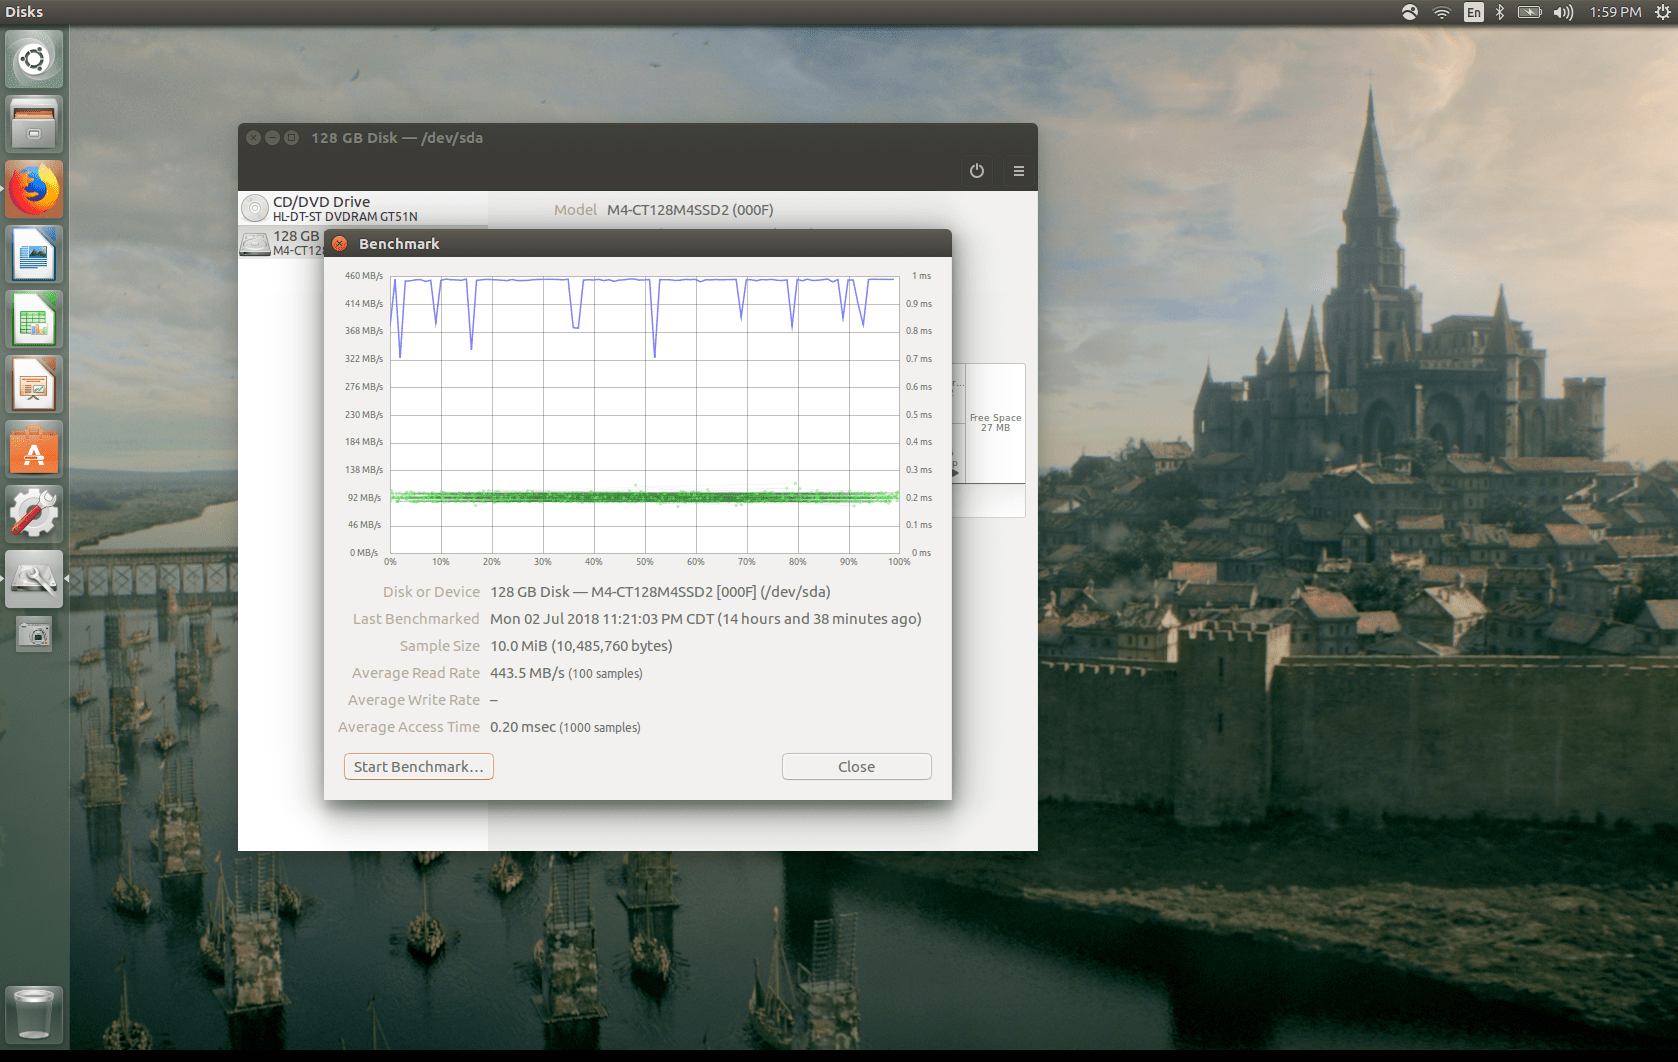
So I am stuck with a dysfunctional internal hard drive bay! But that’s not quite as bad a thing as I was expecting to to be. The read speeds with the external USB bay are nearly the same as an internal bay, as seen below. For some reason the write speed test isn’t working, so I suspect this interface is not quite as good at handling simultaneous read/write.
It also still makes it easy for me to dual boot Windows and Linux. Instead of controlling it from BIOS, however, I control it physically, by switching in the Windows hard drive (a slower, actual HDD) or the Linux SSD drive.
And here I am, with a less portable, but clean and fast setup. This computer is still pretty strong for a 2012/2013 computer, with a 2.30 GHz Quad Core i7, a 670M Nvidia GPU, and generally solid components. I also discovered that this computer has four RAM slots (two on each side of motherboard), with one empty, so I chucked in another compatible 2G RAM stick we had lying around, bringing this machine up to 14 GB of RAM.